 Game Reports
 Equipment Diagnostics
 Order Parts
 Support
 Users
Users

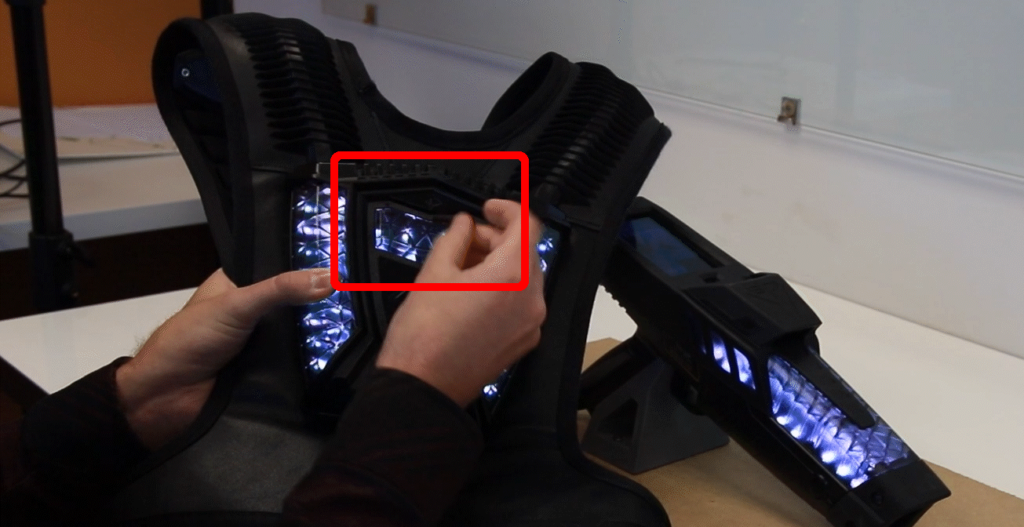
Start by powering off the phaser by inserting the key into the slot in the back sensor. The phaser is off when all the lights have turned off.
Remove the nozzle with a screwdriver or the head of the hex driver by slotting in into the gap at the front of the phaser. Then use the hex driver to unscrew the 6 hex screws on the bottom of the phaser. Ensure that the hex driver is set to 9 and is set to the reverse direction. The top plastic enclosure should now easily pull away.

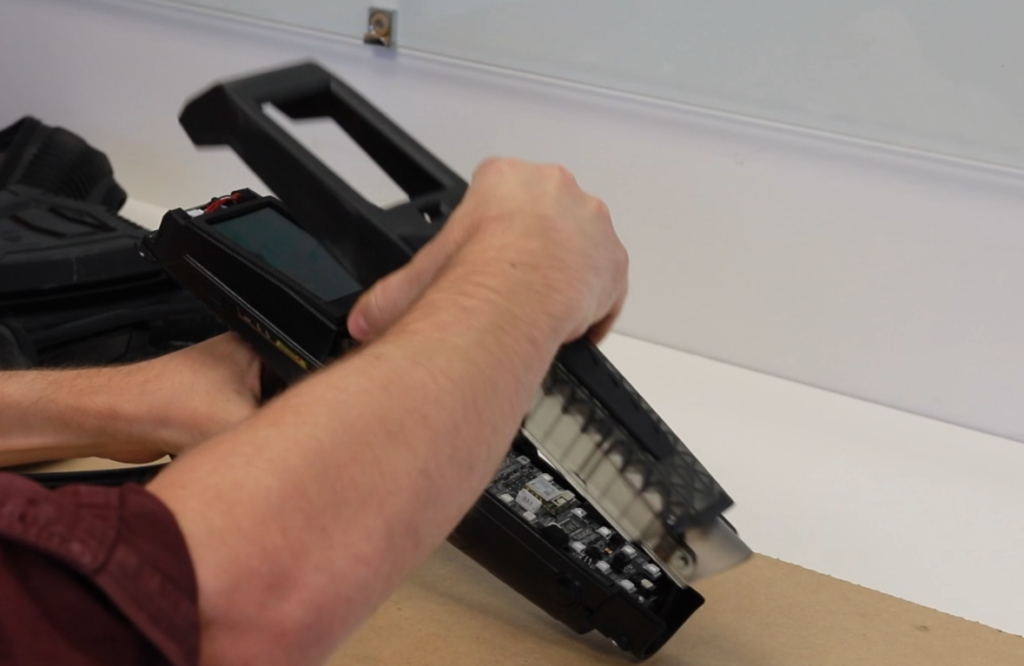
Remove the main board by pulling back on the LCD screen, while gently supporting the front of the PCB. Set the main board to the side of the phaser while you carefully pull out the cables inline with the direction of the plugs.
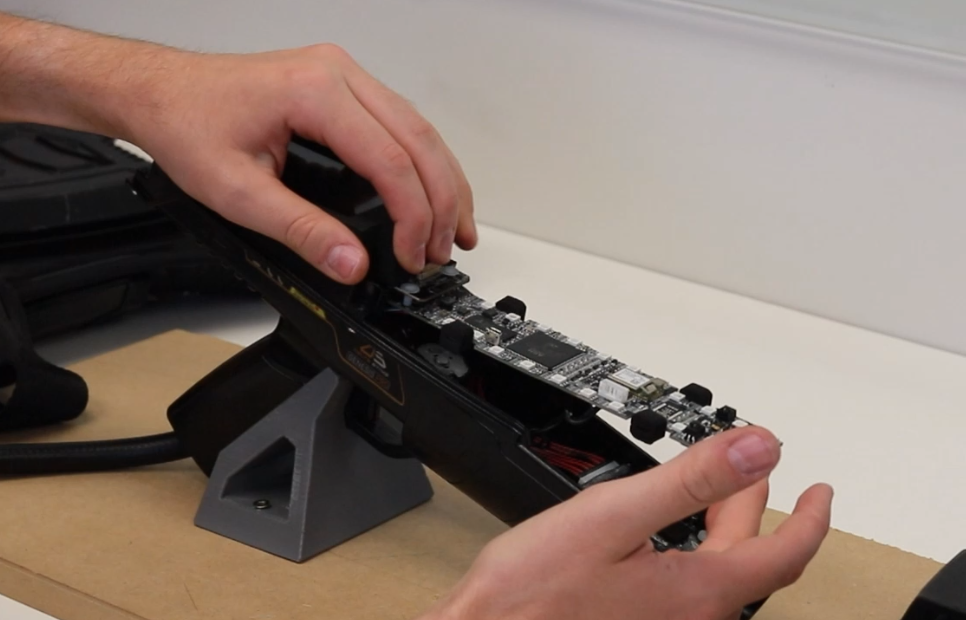
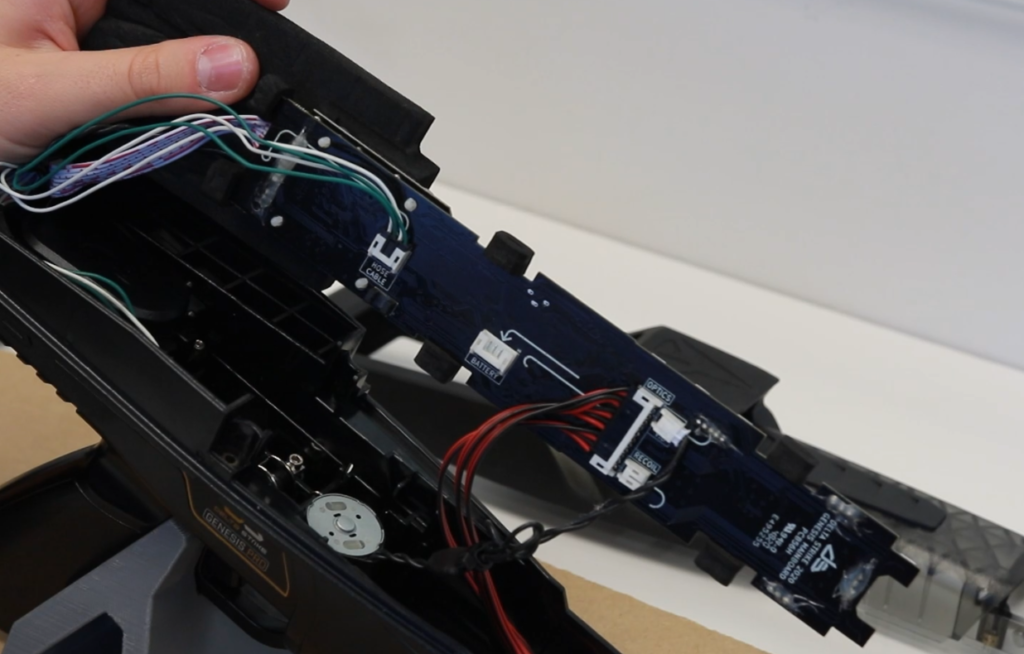
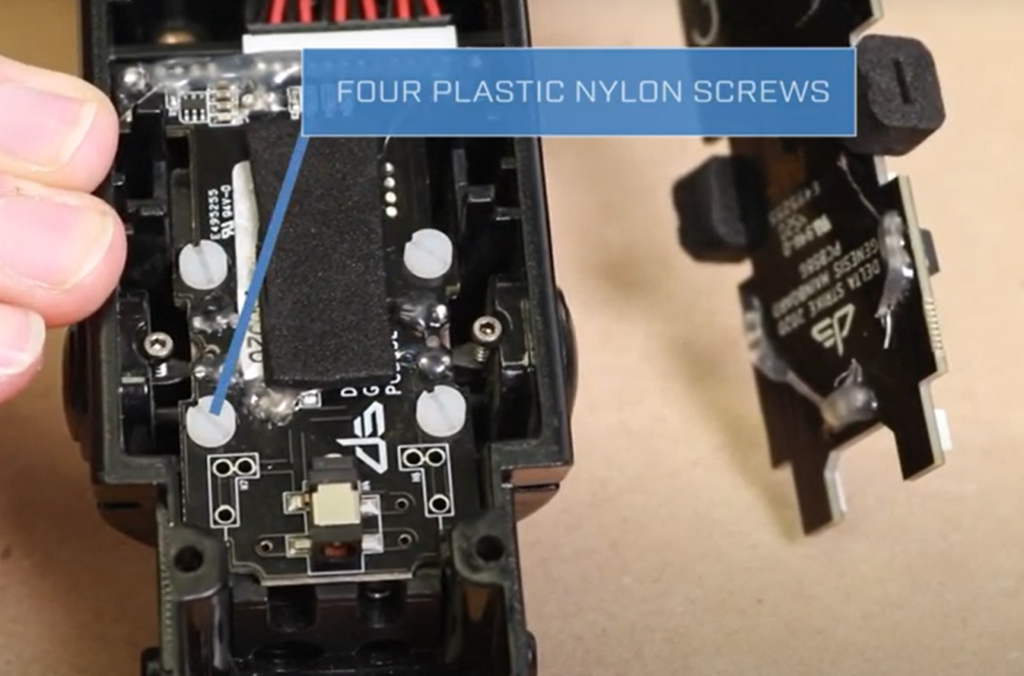
The Optics Block is held in with 4 nylon screws and is located at the front of the phaser. Use a small flat-head screwdriver to undo these. Once they are unscrewed, unplug the cable from the optics block and set it aside.
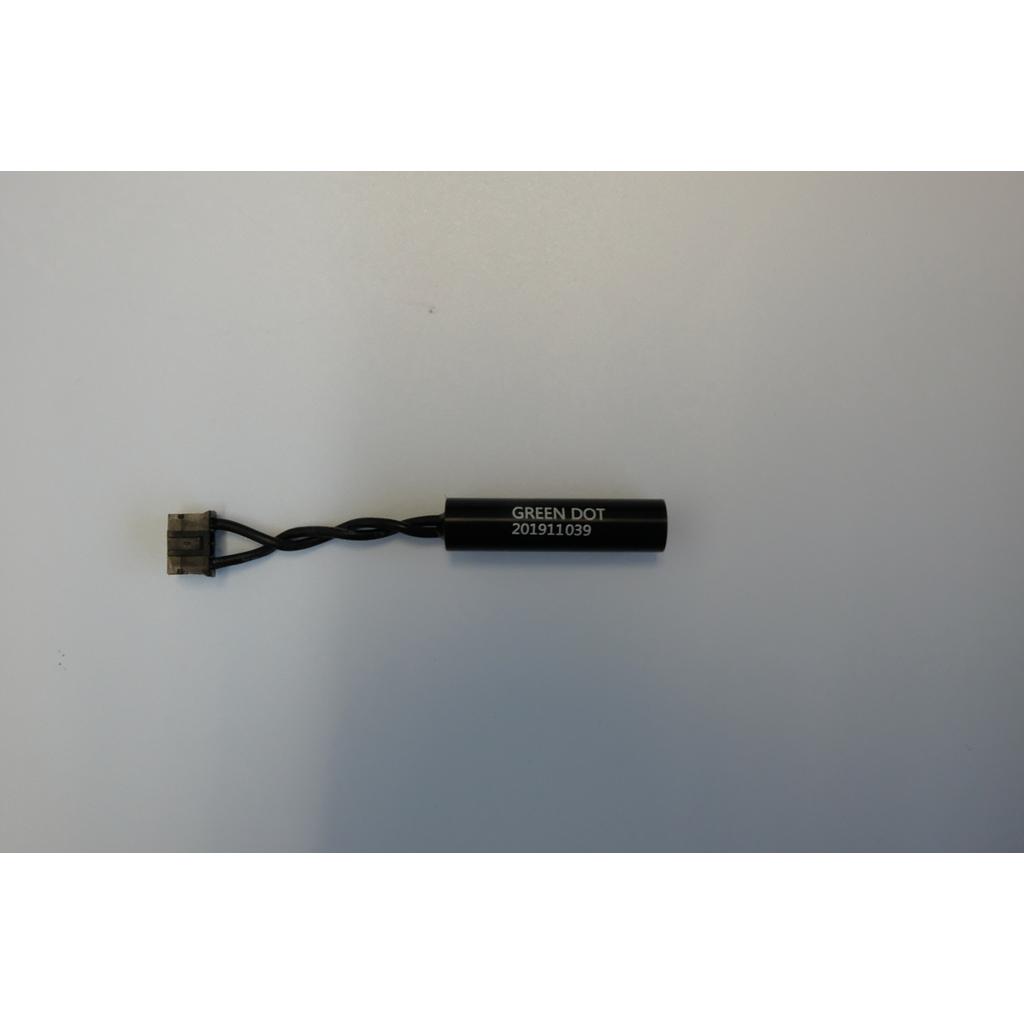
Unplug the Laser from LASER A slot. Plug in your new laser and reassemble.
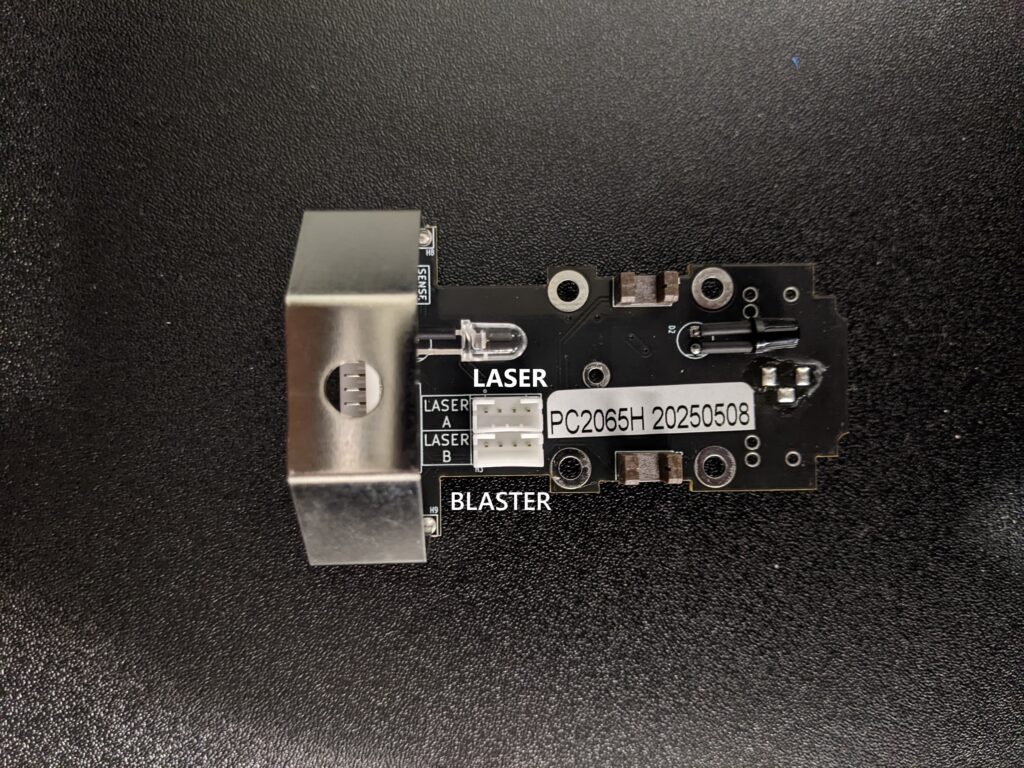
Make sure the bottom LASER is in the proper spot and not covering the IR emitters.
